
Do you want to run a professional ecommerce store but not sure how to get your own free business email address? Well, if that's you, then this article will be perfect for you! I will go over everything you need to know to get your own professional email address for free.
Alright, for those that aren't convinced yet, let's start with why you should have one in the first place.
3 reasons why you should use a business email address
Let's start by learning a few reasons why you should use a professional email address for your ecommerce store.
But first, with a professional email address, I mean something like support@mystore.com. So a custom email address from your own domain.
I don't mean something like support-mystore@gmail.com.
Now that we got that covered, let's begin with the first reason; it builds trust.
1. Build trust and credibility
Unfortunately, scammers still exist, so many consumers won’t be comfortable emailing personal information to a random Gmail address like unicornpower115@gmail.com.
Plus, a professional email address shows the world that your company is established and professional. A generic email address, like the Gmail address above, can raise doubts on whether you’re a real company at all.
This changes when you have a professional email address, now you’re providing a sense of reassurance to your customers that your business is real.
Your professional email address can be an easy recognition of your company as well.
Customers will also start to remember the name of your business, which builds brand awareness and trust. This brings me to the second point, brand awareness.
2. Brand awareness
Another great benefit of using a professional email address is that it builds your brand awareness every time you send out an email.
This is a valuable, cost-efficient way to market your store without having to spend a lot of money.
That's much better than promoting Gmail or Outlook each time you send an email, right?
3. Flexibility
The great thing about having your own email address is that you can create as many as you want. Here are a few examples of email addresses that you can create:
- support@
- mail@
- info@
- admin@
- yourname@
- hello@
Awesome, right?
How to set up a free business email address for your ecommerce store?
Alright, now you know why having a business email address is important for your ecommerce store, let's continue this article by learning two methods to get one of these email addresses for free.
You might be thinking, “Why two methods?”
Well, that's because if I would only give you one option, then I'm sure that a few couldn't get it. That's why I'll give you multiple options!
I will close it off with a paid option but don't worry; I'm 100% sure that you don't need it when you're just beginning.
1. Using Zoho to get a free email address
Let's start with the one that I think will work for all of you that are reading this article.
The other free method is great as well but is mainly for people that are currently using a host for, for example, WooCommerce.
The service that we are going to use to get a free business email address is called Zoho.
Alright, let's begin by verifying your domain on Zoho. Just press the ‘Get your domain email' button, and we can begin!
Step 1. Add and verify your domain
First off, you will need to let Zoho know which domain name you're going to use. If you don't have a domain name yet, then you can purchase one with Zoho, or you can go to Namecheap here to purchase one.

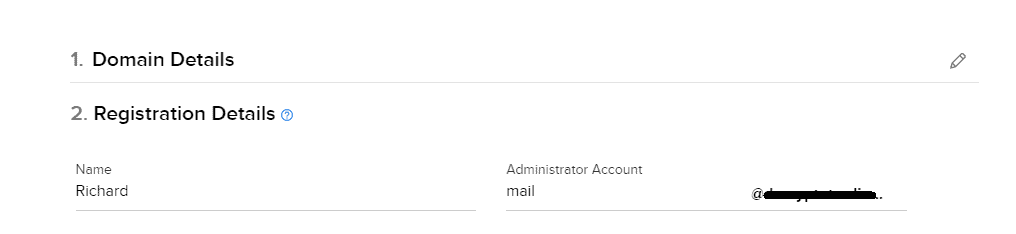
Now simply fill in your registration details so you can create a Zoho account.
After that, you will have to verify your phone number.
Now, if you registered your domain with one of the domain name registrars that you see in the drop-down menu, then simply follow these steps on your screen.
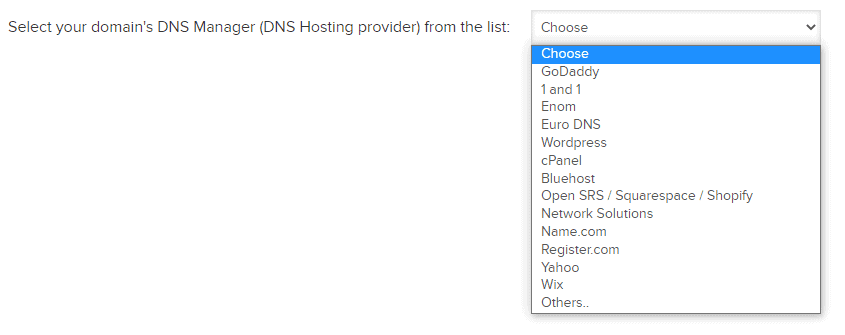
If you don't see your domain name registrar there, then follow me below. I will show you how to set it up with Namecheap which, as you can see above, isn't on the list.
You will have three different methods to verify your domain. If you're not sure what these mean, then you can click here.
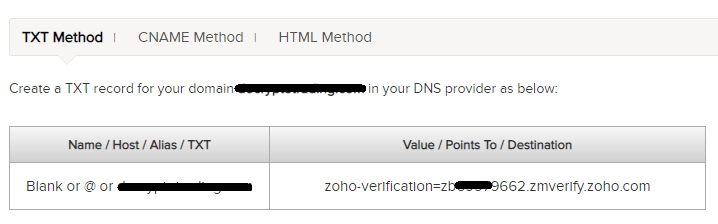
I will use the TXT method for this example.
Now all you have to do is head over to your domain registrar, in my case Namecheap, and go to the section where you can edit the DNS of the domain that you want to use to create a free business email address.
For Namecheap, that's called ‘Advanced DNS'.
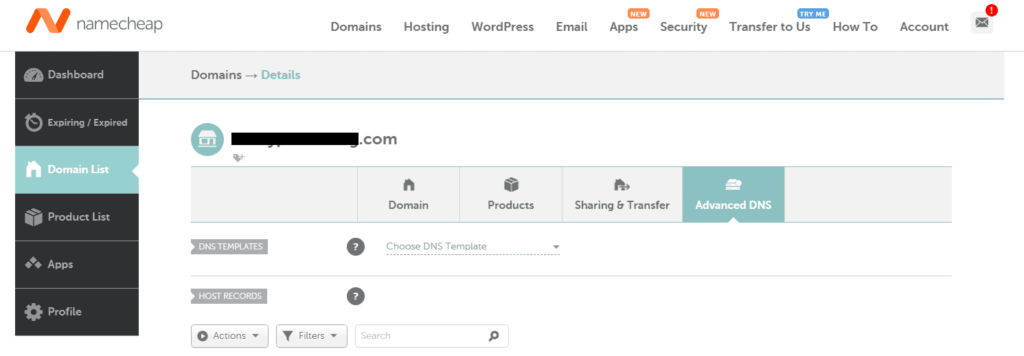
Now simply scroll down to ‘Host Records' and add a new ‘TXT Record' there. As you can see below:
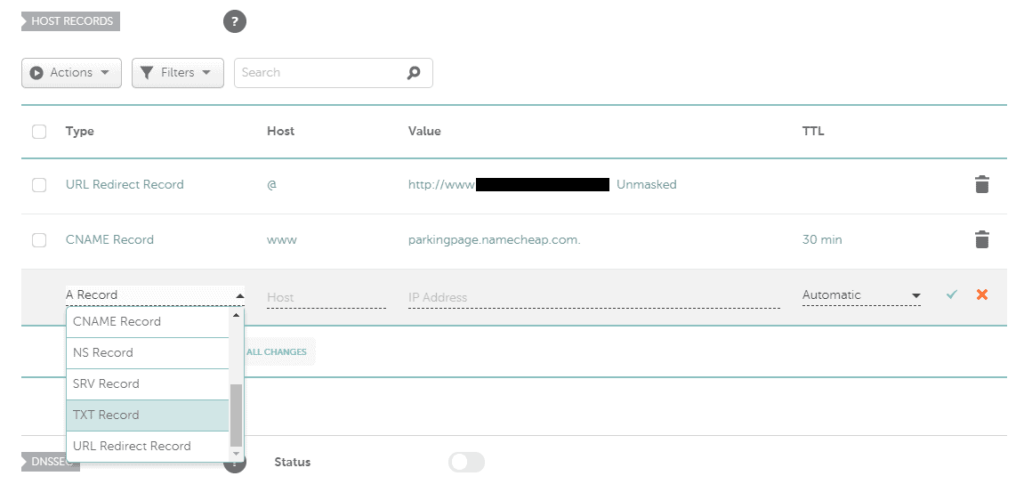
Tip: You don't need to keep the default DNS records there from your domain registrar (like the one you see above from Namecheap; ‘parkingpage'), but do keep in mind that you don't see anything otherwise when you enter the domain in your browser, just a ‘This site can’t be reached' message.
Zoho recommends leaving the ‘Host' value either blank or you can add a ‘@' there. The ‘Value' speaks for itself, that's the domain that you needed to copy from the ‘Domain Setup' page from Zoho. (As you can see in my screenshot of the ‘TXT method' above)
Here is how it would look like then:

They also recommend, if the TTL is editable (the value on the right), to reduce the TTL to 300 seconds or the minimum possible value recommended by your registrar.
I will leave it at 5 minutes for this example, but you can also leave it at ‘Automatic' if that's an option for you.
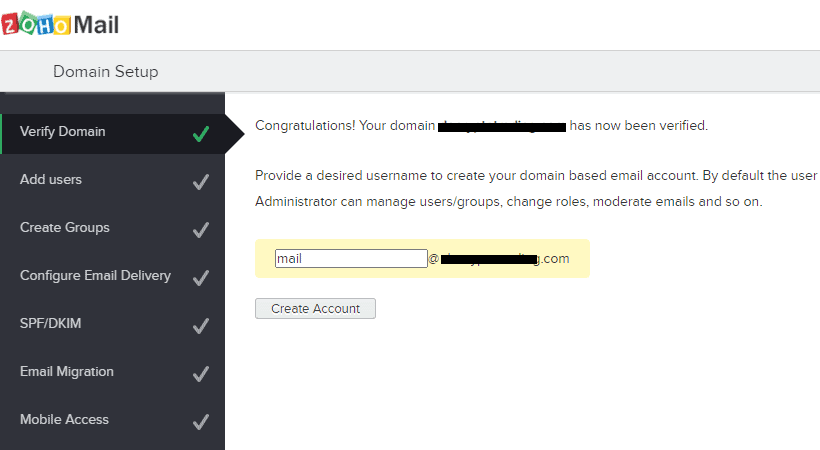
Now simply press the big green verify button at the bottom, and you will see if you did it correctly or not. Keep in mind that it sometimes takes a bit of time before the DNS records are correctly updated.
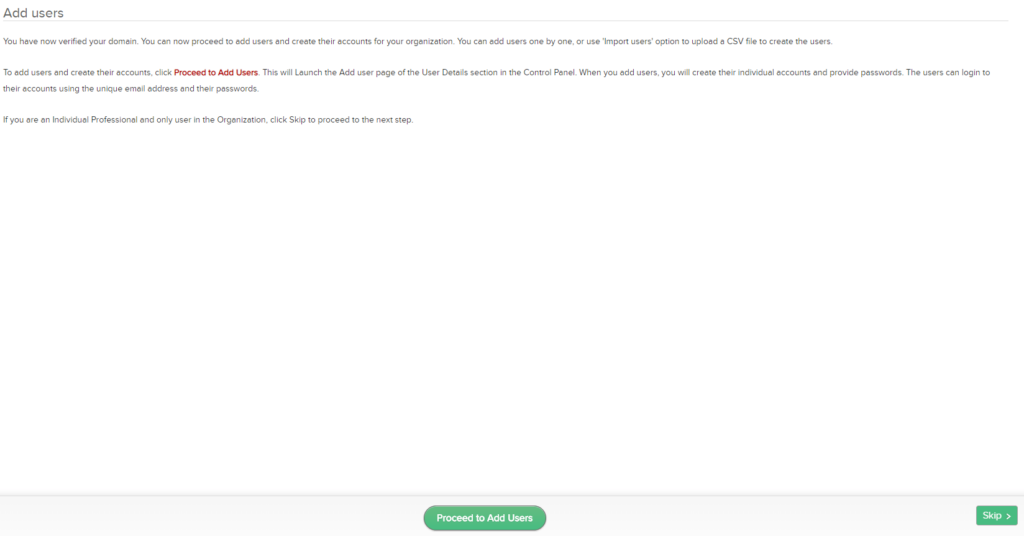
Step 2. Adding users
Alright, so next up is creating your administrator account. The email address you use here will be the so-called ‘Super Administrator'. I decided to go for ‘mail@':
Now you have the option to add users. If you're like me right now and don't have any users to add, then simply press ‘Skip'.
Step 3. Create domain-based email accounts
Now the next step could be important for you if you, like me, created a ‘mail@' account as administer but still want to have a different account for customer service emails.
So, let's create a ‘support@' email address.
Just press the add groups button, and it will bring you to the same screen as I showed below. Here you will press on ‘Add Group'.
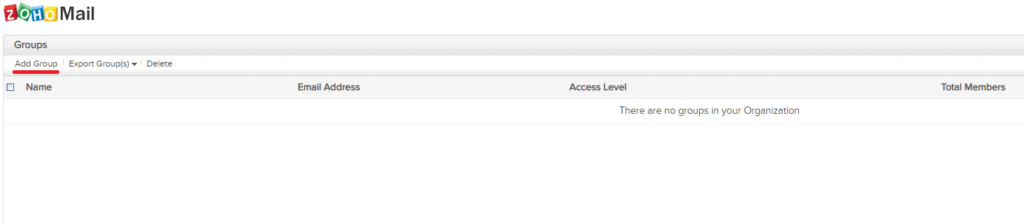
Here you can fill in the information of the email address that you want to create. After you're done, simply press the ‘Create group' button at the bottom:
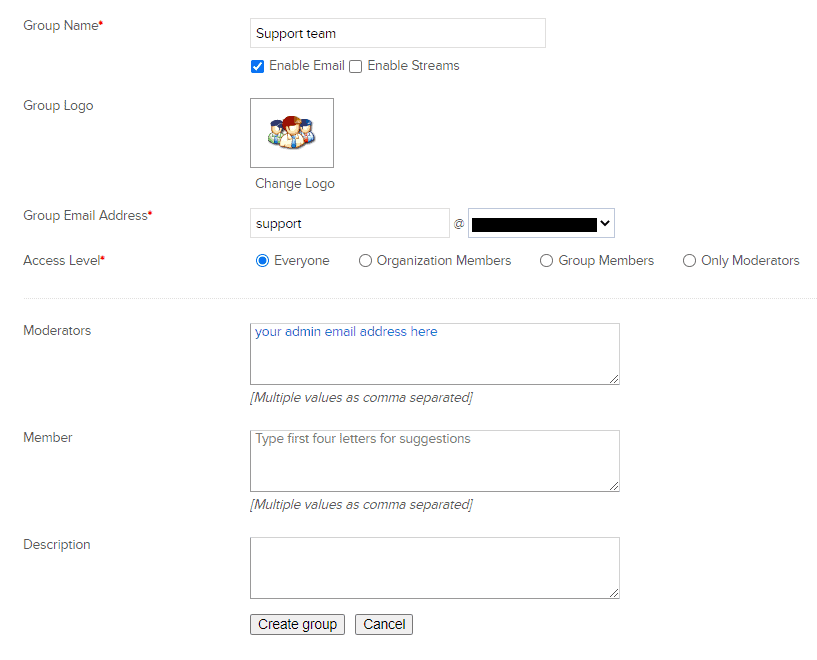
By default, the ‘Group Name' is your display name. Meaning that people who receive your email will see that as the receiver name. You can change this later if you want. (More information about that here)
Don't forget to add your administrator email address (the one that you created at the beginning ) as one of the moderators.
Plus, don't forget to edit the permissions of your account after you created the group by pressing the little edit pencil next to your email address. You can use these permissions so you can also send from your newly created support email address:
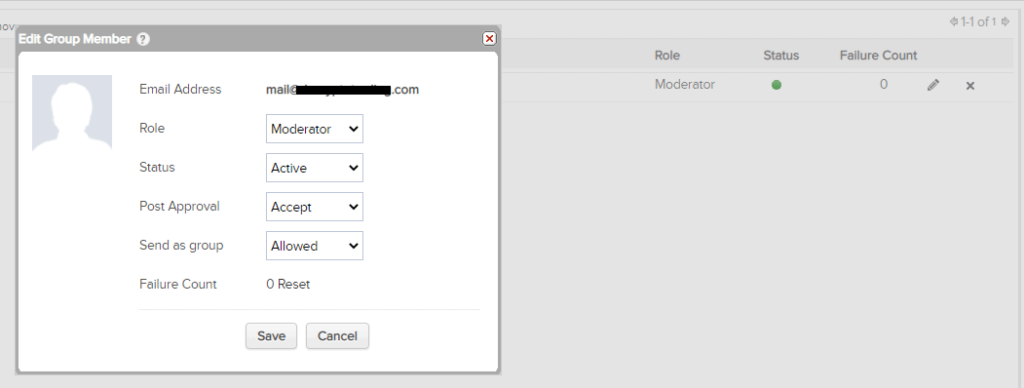
Keep in mind that you can make it way more complex than I showed you above. For example, by making the email only accessible for certain group members.
After that's done, and you don't want to add any more email addresses, then you can press the ‘Back to setup' button at the bottom to continue setting up your domain with Zoho.
Step 4. Configure your domain's MX records
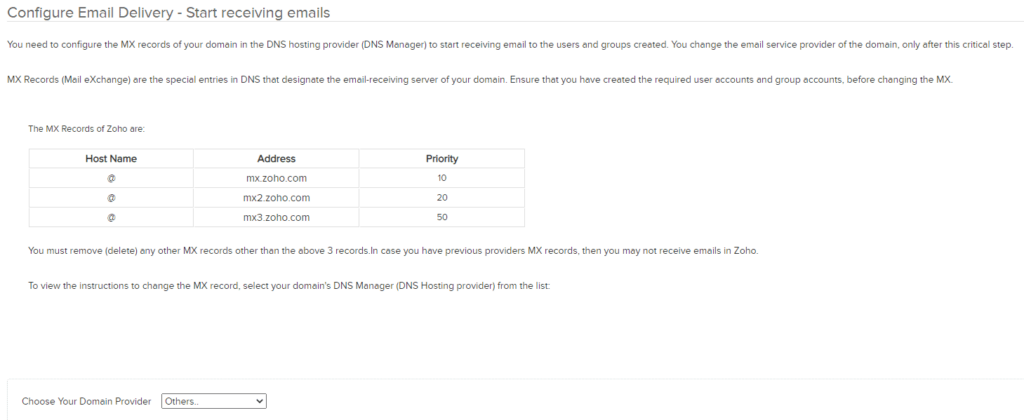
Now it's time to configure your domain by adding the MX records from Zoho. Don't worry if you don't know what these are; just follow me below.
Alright, just head back over to your domain registrar and search for the place where you can edit your MX records.
For Namecheap, this is the same place where you added the TXT record. Just scroll down there and search for ‘Mail Settings'.
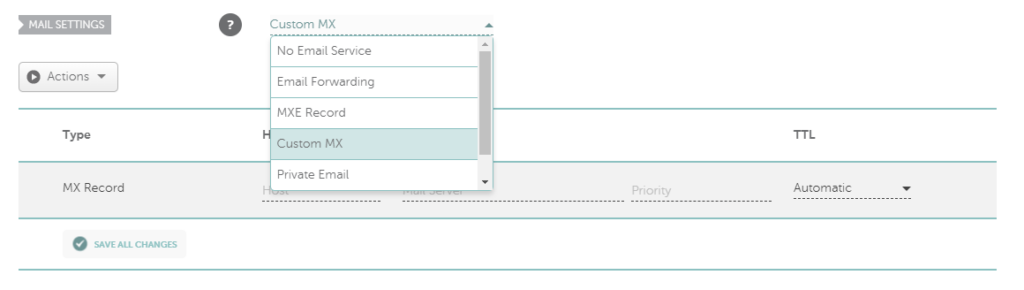
Here you can add all the MX records as indicated by Zoho in their Domain Setup guide (as you can see in the screenshot above). Here is how it will look like after you have pressed save:
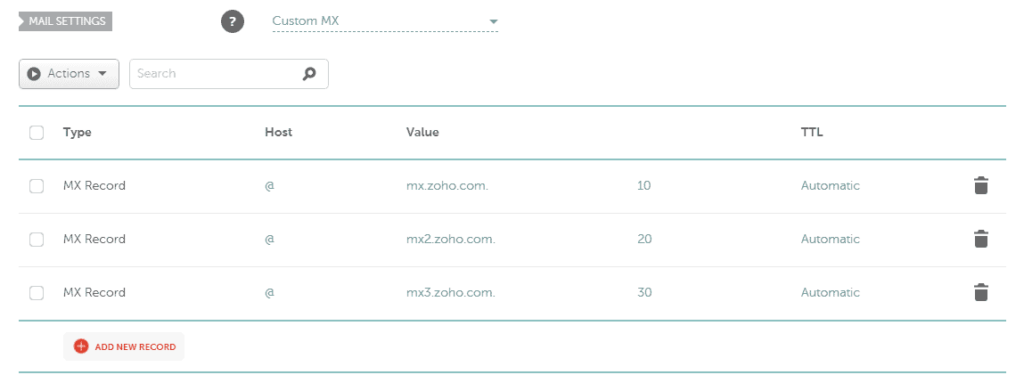
You can edit the ‘TTL' again, but I kept it on ‘Automatic' this time.
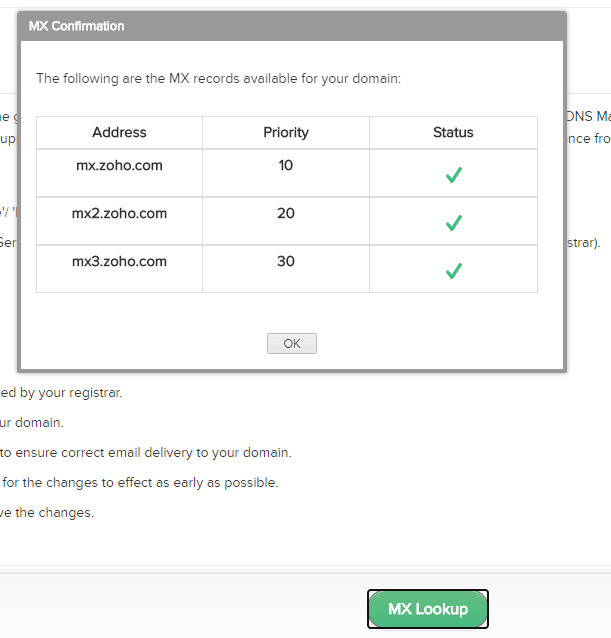
After you're done, simply press the ‘MX Lookup' button at the bottom. This will check if you correctly added the MX records or not.
Keep in mind that this might take some time again as DNS records aren't updated instantly and sometimes take up to 24 hours to update.
One tip I got here for you, if Zoho doesn't see the change yet, is by changing the TTL to the lowest option possible. With Namecheap, that is 1 minute.
If everything is correct, then you will see the screen below and can press the ‘Next' button.
Step 5. Adding SPF & DKIM records
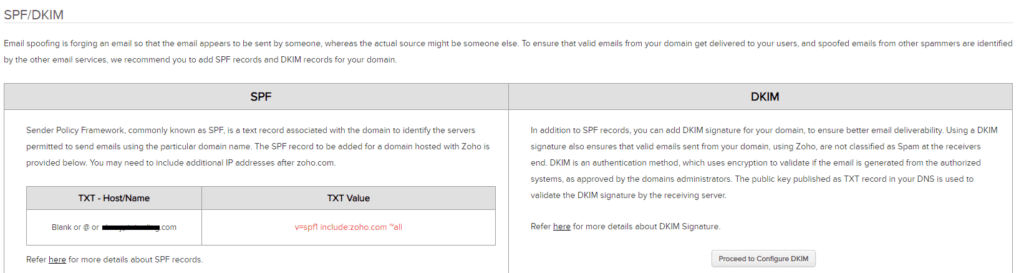
Next up is adding SPF and DKIM records to your domain to prevent email spoofing.
Adding the ‘SPF record' is simple, it's the same as when you added the first ‘TXT record' to your domain:

Next up is configuring your ‘DKIM record'. You can do this by pressing this button here:
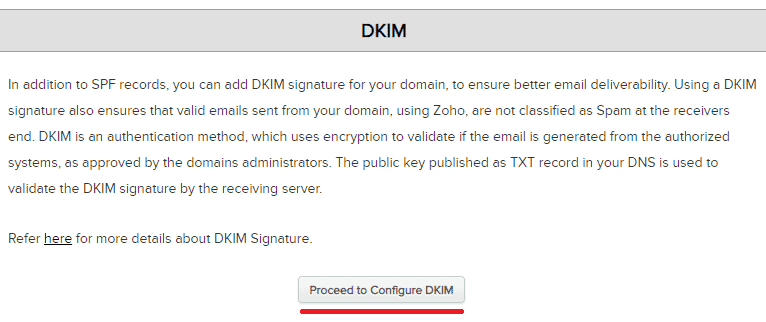
You will probably see here that DKIM isn't enabled yet. All you have to do now is press the little edit pencil:
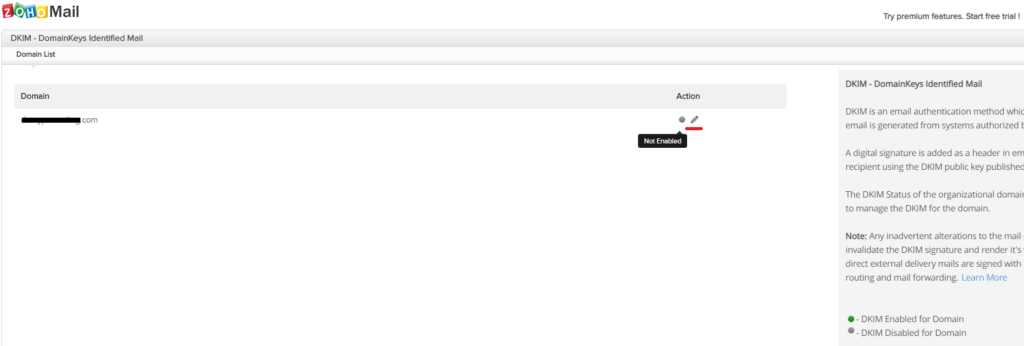
Now press on ‘Add Selector':
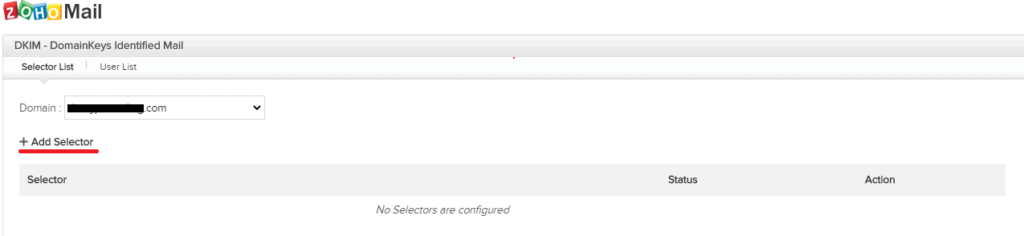
Now add a selector name here. For example, ‘zoho', and press ‘Save':
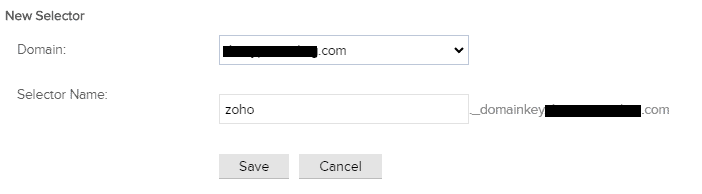
If everything goes right, then you will now see this screen:

All you have to do now is add this TXT record to your domain. The only thing different now is that the host value isn't ‘@'. Here is an example of how this will look like:

Now go back to your Zoho domain setup and press the ‘Verify' button. Again, this might take some time. You can always change the TTL to a lower value if it's taking to long.
Also, keep in mind for the value to only fill in the first part and not the part with your domain name. So in my case, that is ‘zoho._domainkey'.
Step 5. Optional steps
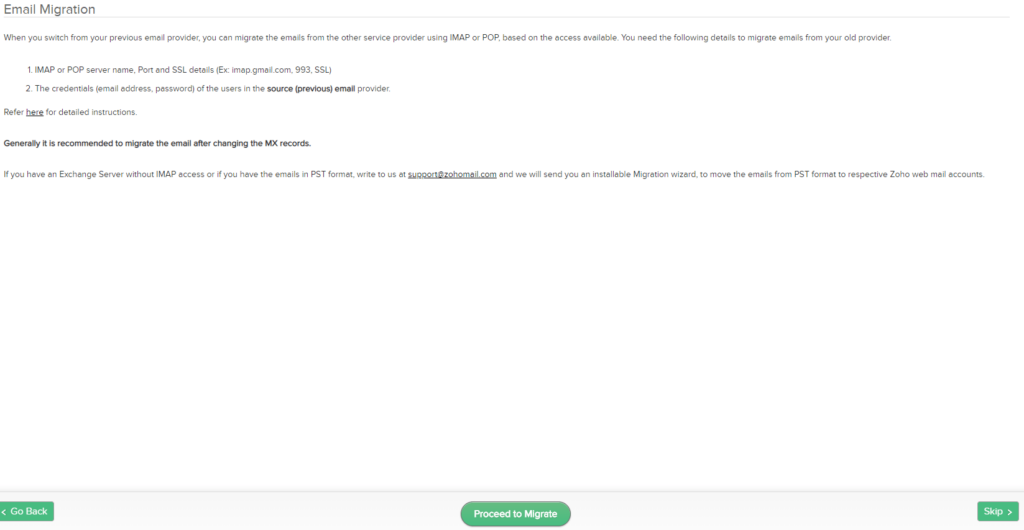
If you need to, then now is the time to migrate your email from your previous email provider.
I won't be doing that now, but if you need it, then simply press ‘Proceed to Migrate' and follow their introductions there.
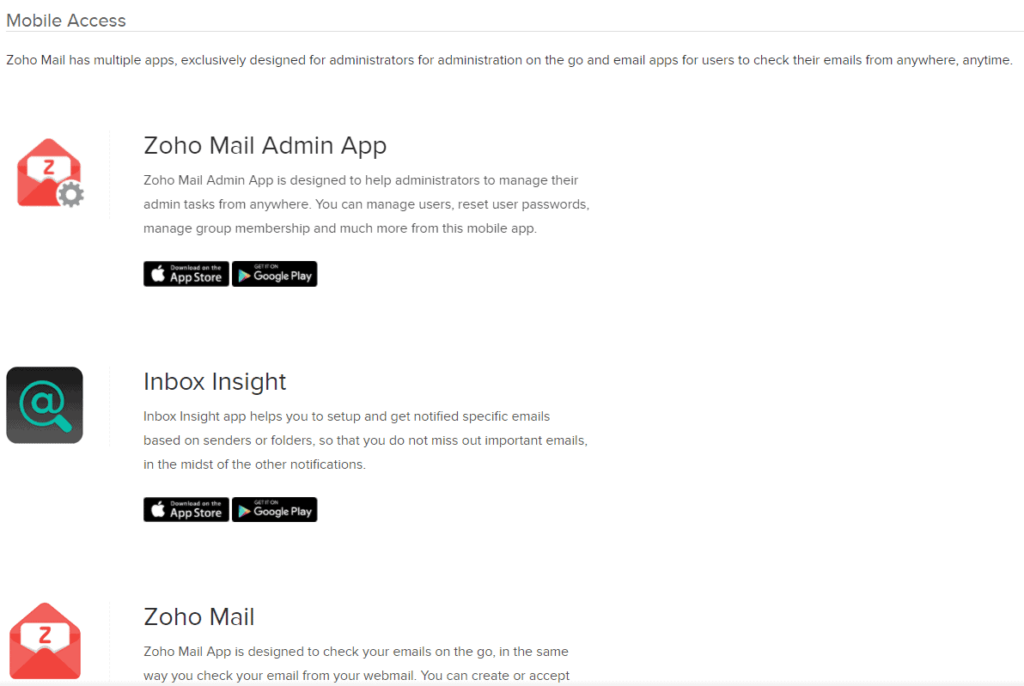
Plus, you can download the mobile app from Zoho on the next step if you want that.
Step 6. Finished

Congratulations! You now have a free business email address for your ecommerce store.
Now you can test it by sending an email from another email address that you own (for example, your personal email address) to your newly created email address to see if everything works!
Let's continue now by seeing another free method to get an email address for your store. The next method is mainly for those who own a WooCoomerce store.
2. Using your host to get a free email address
If you're currently using WordPress/WooCommerce to host your ecommerce store, then this one is for you!
Most hosts let you create a free business email address that goes through their servers.
This one will be much easier to set up as you already connected your domain to your host to get your website online. If you didn't do that yet, then you can easily find more information on your host's website. For example, this article for SiteGround.
Alright, so I will take SiteGround as an example here, but don't worry, I'm 100% sure that you can figure it out as well if you're not using SiteGround for your store.
First, make sure to go to your website and select ‘Site Tools' so you will get this screen:
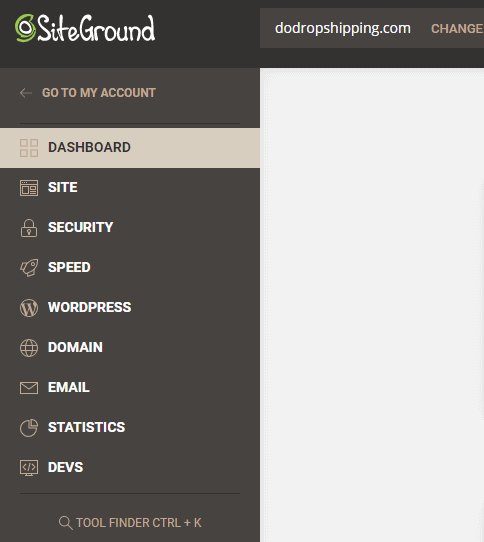
Then press on ‘Email' so you will get to see this screen:
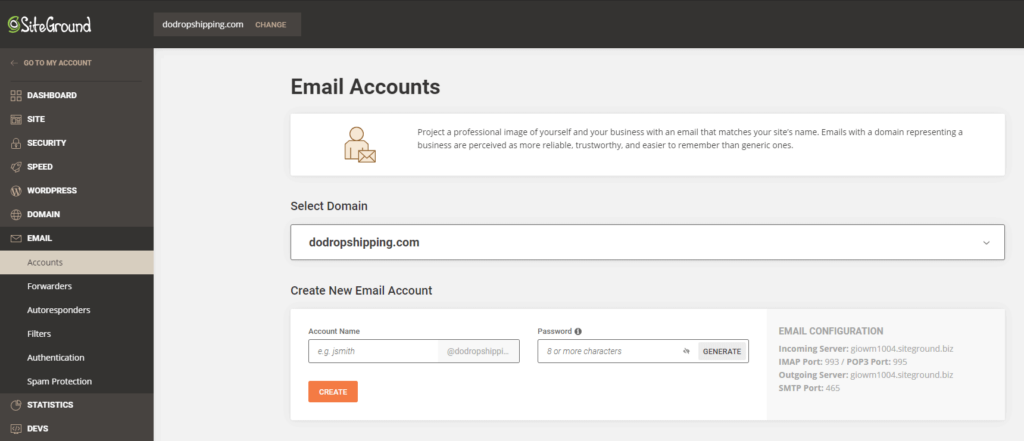
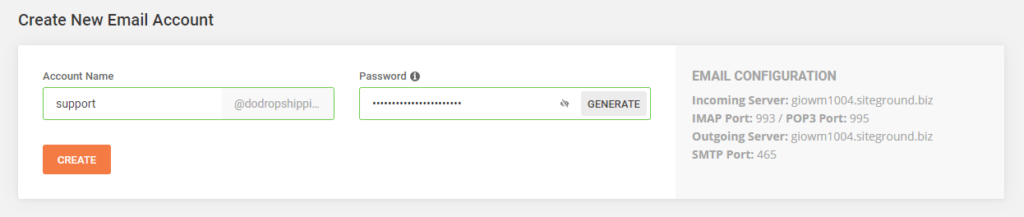
Here you can add the email address that you want. For example, you can create ‘support@domain.com':
Congratulations! You now have a free email address for your ecommerce store.
Feels great, right?
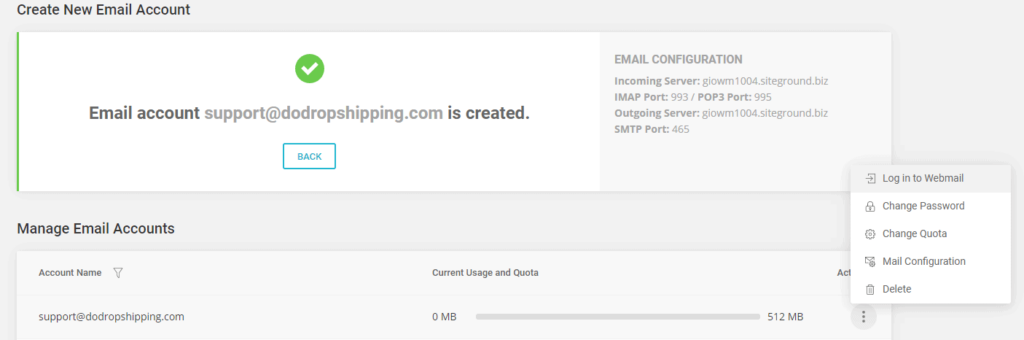
Now you can log in directly to their webmail (most hosts have that). Or you can configure it so you can use it with your favorite mail application like Gmail or Outlook.
If you want the latter one, then simply press ‘Mail Configuration' and follow their steps there.
How to get a paid business email address for your ecommerce store?
Now that you know how to get a free business email address let's continue by learning how to get one that isn't free.
Just don't forget that this isn't necessary if you're just beginning, the free methods work great as well! This is just extra for the people that don't want or can't use the two free options above.
Once again, I got two great options for you, so I'm sure that you can find a solution that fits with you and your ecommerce store. Let's begin!
1. Using your domain register
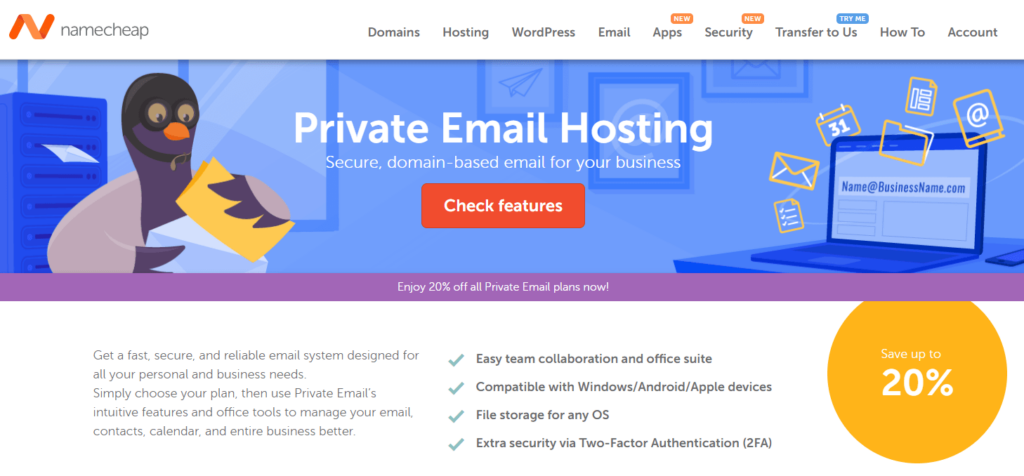
The first paid and simplest option is to use the same domain register as you used to register your domain for your ecommerce store. I will use Namecheap for this example.
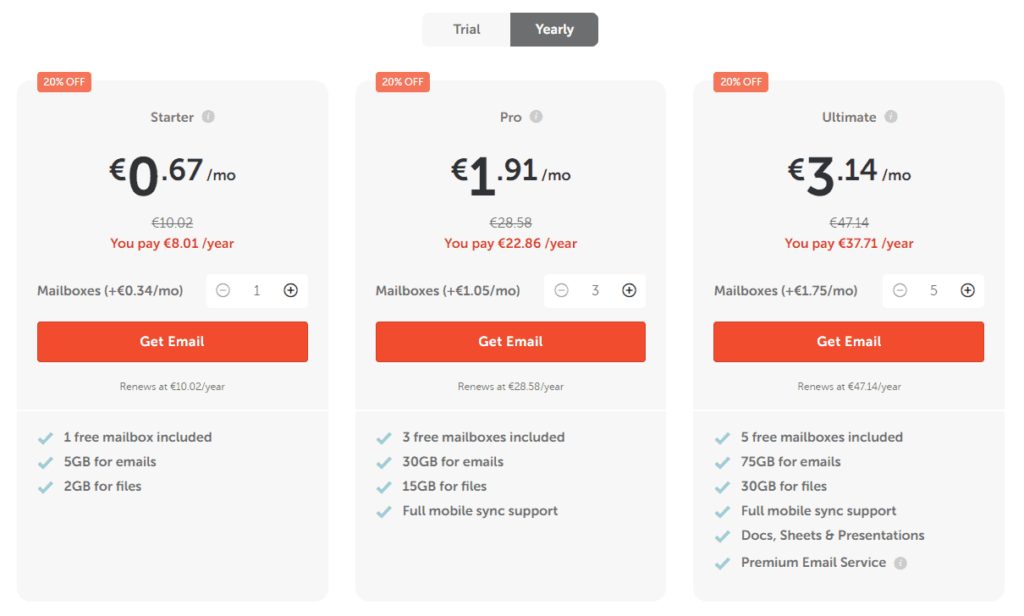
The great thing about Namecheap is that they got a free two-month trial. So if you don't like it, then you can cancel it! You can see the rest of their pricing here:
The set up works pretty straight forward like setting your DNS records correctly, just follow their steps here.
2. Gsuite
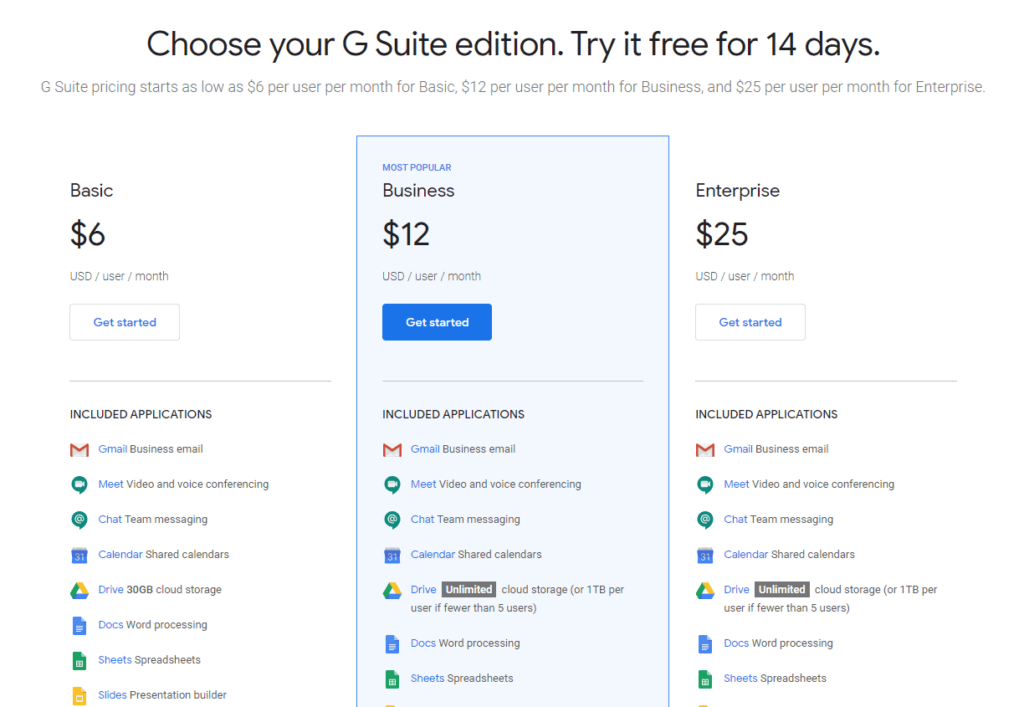
The next option to get a paid business address is by using Gsuite from Google.
Gsuite is a bit more expensive, but it offers way more than just a custom email address. Just take a look at their pricing here, and you will see what I mean:
The great thing is that Gsuite does have a discount code that you can use, you can check it out here.
Conclusion
So, there you have it; everything you need to know to get a free business email address for your ecommerce store.
I hope you understand now as well that having a business email address is great!
Now that you have created your email address, which is probably for your customer service, you can read this article here to learn more about how to take care of your customers.
If you got another method to create a free email address or if you have any questions, then let me know by commenting below or contacting me directly by pressing the “Contact Us” button at the top.
And let me know if you successfully created an email address for your ecommerce store after reading this article!
I wish you the best with everything!
")
")
")
")


8 Comments
Great work again… Extremely helpful as a Name cheap user.
Thanks so much,
Hi Gbenga,
Thank you for your amazing comment! That’s great to hear 😊
Good luck with your business!
– Richard
Hi, I followed your steps, for making a free e-mailaddress with Zoho. But it says I have a Trial version? So it will have to be upgraded… so it’s not free then?
Hi Alicia,
Thank you for your comment! Great question, could it be that you accidentally signed up for the trial of the paid plan? (They have a paid version, which you can learn more about here)
On that page, you will see that they still have a ‘forever free plan’ 😊
Let me know if that works, and good luck with everything!
– Richard
Hi, follow up reply:
I did end up contacting them, they said you are automatically put in the trial-version until that is over, than they switch you to the Free-plan, unless you would like to stay in the paid version of course.
Thanks for your reply, love your website!
Hi Alicia,
That’s awesome to hear! Good luck with everything 😊
– Richard
Super helpful, I’ve followed many many many of your blog posts now.
The best dropshipping advice are in your page, I did a course before and non of these steps were in there.
Thank you!
Hi Ana,
Thank you for your great comment! That’s awesome to hear that you like our blog and that these steps were not in the course that you took 😊
Good luck with everything!
– Richard